Had an amazing time in Class 1! Here's my progress reel for Animation Mentor Class 1. YAY! Hope you guys like it! I was so busy wrapping things up for class 1 that I totally forgot to write posts for the last two assignments (Vanilla Walks and Personality Walks). I will be posting soon along with some tips and technique for minimizing the pain and "pops" when doing walks. :)

My Animation Journal
Monday, October 1, 2012
Sunday, September 30, 2012
Class 1 / Week 11: Personality Walk (Polishing)
Bitter sweet moment! Week 11 was the last week of assignments for Class 1 so for this week we had to to spline and polish our personality walk. This is the first time for me, with an AM assignment, that I had a clear picture in my head of how I wanted the animation to look like and the end result was somewhat similar. Not perfect, by no means! But I did feel proud of my work for once in Class 1! Major thanks to AM, the students, my classmates and my awesome mentor, Nate Wall and my family for always making me push the extra mile. As some of you already know, I was completely new to animation and without these guys, I'd probably be stuck trying to figure out how to do a simple bouncing ball. :)
Here's my final assignments for Week 11. I also had to do a pose depicting "Balance".


Sunday, September 23, 2012
Class 1 / Week 10: Personality Walk (Blocking)
More walks! For the Class 1 final assignment we had to do another walk but this time our goal was to do a walk with personality. Personally, this was my favorite assignment for the whole term and the week's lecture with Carlos Baena was awesome! Tons of content and tips on how to portray a character's personality through a walk. We also had to do research on walks, watch movies with characters with interesting walks and record our own reference. I've never had so much fun doing homework! Where else you get to watch movies and cartoons for reference and then record yourself acting stupid and walking like an idiot in front of the camera? Love it! I posted all the reference shots below that I used for my shot. Some of them are pretty silly! :) We also had to pose STU depicting "exhaustion". The pose I did pretty much portrays how I felt by then end of Class 1! hahaha


Friday, September 21, 2012
Class 1 / Week 9: "Vanilla" Walk / Polishing
The assignment for this week was basically work on any revisions for the blocking pass and add more details to the animation. Some might call this stage: blocking plus. Once we finish our blocking plus we can finally move into spline mode. Also for blocking plus, I turned all my keys into "Linear" mode. This way I could have a better visual of what my timing was looking like. At this stage, knee pops might be a bit more obvious.
Here's some of the things I focused on during the blocking plus stage:
Hips: Added hip rotations and some overlap between the side to side/ up and down movement.
Feet: I chose to animate straight ahead, frame by frame. At this stage, I also added some drag and overlap on the feet. Just be careful of adding too much or it might add to much personality to the "Vanilla" walk. Remember, this is a very basic walk. I also went back and double checked my feet placement and corrected any sliding on my feet, if any. Also worked on the peeling of the foot as it lifts off the ground. It should be nice and smooth as it makes contact and lifts the foot again.
Arcs: The cleaner the arcs the smoother the animation and the less chances of getting those pesky knee pops. I used the arc tracker tool from AM to track all my arcs.
Polishing / Final
I'm ready to spline and polish the animation. Yikes! Once splined, I went in order of hierarchy and clean up all my key frames/ tangents. I started by the hips, worked my way to the feet and finally the legs. Make sure to work on the hips first, the feet and finally the legs. Otherwise you might find yourself going back and forth between the poses fixing and breaking things.
Knee Pops:
One trick I learned from Bobby Beck was to used the stretch knee controller on Ballie to fix any knee pops that you may have. Just be careful not to stretch or shrink the leg too much, otherwise it might start looking a bit odd and deformed. Also, remember not to lose your key poses when using the stretch controller. Before my revision, I made the mistake of using the stretch controller too much and lost some of my extremes down poses. Lesson learned! ;)
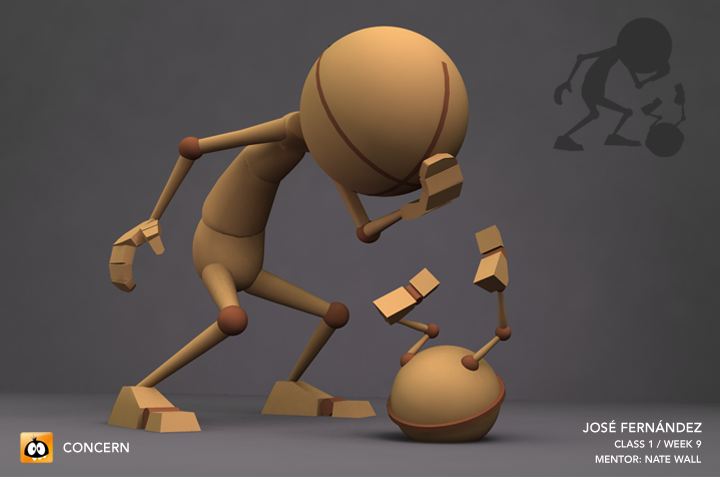
For this week I also had to do a pose with STU depicting "concern".


Here's some of the things I focused on during the blocking plus stage:
Hips: Added hip rotations and some overlap between the side to side/ up and down movement.
Feet: I chose to animate straight ahead, frame by frame. At this stage, I also added some drag and overlap on the feet. Just be careful of adding too much or it might add to much personality to the "Vanilla" walk. Remember, this is a very basic walk. I also went back and double checked my feet placement and corrected any sliding on my feet, if any. Also worked on the peeling of the foot as it lifts off the ground. It should be nice and smooth as it makes contact and lifts the foot again.
Arcs: The cleaner the arcs the smoother the animation and the less chances of getting those pesky knee pops. I used the arc tracker tool from AM to track all my arcs.
Polishing / Final
I'm ready to spline and polish the animation. Yikes! Once splined, I went in order of hierarchy and clean up all my key frames/ tangents. I started by the hips, worked my way to the feet and finally the legs. Make sure to work on the hips first, the feet and finally the legs. Otherwise you might find yourself going back and forth between the poses fixing and breaking things.
Knee Pops:
One trick I learned from Bobby Beck was to used the stretch knee controller on Ballie to fix any knee pops that you may have. Just be careful not to stretch or shrink the leg too much, otherwise it might start looking a bit odd and deformed. Also, remember not to lose your key poses when using the stretch controller. Before my revision, I made the mistake of using the stretch controller too much and lost some of my extremes down poses. Lesson learned! ;)
For this week I also had to do a pose with STU depicting "concern".

Tuesday, September 18, 2012
Class 1 / Week 8: Introduction to Walks / Blocking
This week we finally got introduced to a very important animation body mechanic, walks. Personally, this one of my favorite subjects to study in people. I always found myself observing how people walk and how each person's walk is different from one another. There's so much you can tell from a person's way of walking. Are they walking fast or slow? Maybe their torso is up straight? Or is it be hunched over? Is the person limping or skipping? All of this little nuances like this can give out so much information about a person's personality or history.
For this week, our assignment was to create a "Vanilla" Walk. In other words a "basic" or "standard" walk. This means it shouldn't have any personality or character. Or like my mentor said: "Keep it boring!" Also, the STU pose for this week was strength.
Walks are hard! Animating walks is one of the most difficult things to do. The entire body is in motion during a walk so it's very important for us as animators to understand how it all works together. Luckily, for this assignment we start off with the "Ballie" rig so we can focus on understanding the mechanics of the hips and legs and their relationship to one another without worrying about the spine, arms, hands and head. We'll be introduced to full body mechanics in Class 2. Yikes! ;)
For this week we only had to block out the animation in Stepped Keys and creating our basic key poses that make up a "Vanilla" walk.
For a Vanilla Walk all we need to do is follow the recipe. There's 3 main components that make up a walk:
Keys: contact positions
Breakdowns: passing position
Extremes: lowest and highest points of the walk
Timing: in two's / 2 steps per second (24 frames)
Tips:


For this week, our assignment was to create a "Vanilla" Walk. In other words a "basic" or "standard" walk. This means it shouldn't have any personality or character. Or like my mentor said: "Keep it boring!" Also, the STU pose for this week was strength.
Walks are hard! Animating walks is one of the most difficult things to do. The entire body is in motion during a walk so it's very important for us as animators to understand how it all works together. Luckily, for this assignment we start off with the "Ballie" rig so we can focus on understanding the mechanics of the hips and legs and their relationship to one another without worrying about the spine, arms, hands and head. We'll be introduced to full body mechanics in Class 2. Yikes! ;)
For this week we only had to block out the animation in Stepped Keys and creating our basic key poses that make up a "Vanilla" walk.
For a Vanilla Walk all we need to do is follow the recipe. There's 3 main components that make up a walk:
Keys: contact positions
Breakdowns: passing position
Extremes: lowest and highest points of the walk
Timing: in two's / 2 steps per second (24 frames)
 |
| From Richard Williams The Animator's Survival Kit |
Tips:
- Keep an eye on your forward translation . It should be a constant smooth line at all times. One trick I used was to switch from stepped to linear every now then on your Graph Editor. If the translate z/x looks a bit jagged, smooth it out and go back into stepped mode when you're done. You might have to go back and reposition the legs and feet. You'll thank me for this later, it will save you lots of work during splining.
- Always keep the contact foot "grounded" it should not move until it peel's off the ground. Otherwise you might get some sliding on the feet as it moves forward. Check those values on your channel box and make sure are identical.
- Keep track of the arcs and the spacing of the hips, legs, and feet between your poses. Any drastic change in spacing between the legs/knees and it's going to give you some pretty bad "pops' on the knees. Knee "pops" are unavoidable at this stage but if you keep your spacing nice and even with clean arcs, it might save you some headaches and a couple of keyboards smashes down the line.


Tuesday, September 11, 2012
Class 1 / Week 7: More Overlapping Action / Tailor
Before I forget, let me start of with saying that this week will test your patience! Week 7 was a continuation of the principles of Overlapping Action and Follow Through. But for this week's assignment we had to apply what we've learned from animating the Pendulum and apply the same concepts and principles to a character with a character rig named "Tailor". The challenging part of this assignment is not just adding overlap, but because tails work as an extremity of a living creature, in this case, a squirrel-like character. The movement is also affected by the animal's ability to control the tail. We must be really careful and study a tail's movement to make sure not only follows all the principles of overlapping action, but it must also feel "alive" and with character. We also had to apply all the principles learned in the previous sessions like the timing and spacing of a bouncing ball, anticipation and squash and stretch. This was probably the hardest assignment for me in the entire Class 1. I understood the concept pretty well in theory. I could animate the scene in 2D and illustrate the tail movements as well, but I couldn't get it to work in 3D. For some reason, I was having a lot of trouble visualizing the previous key frames and following the shape of the tail as it moved to the next frame. Also because of the rig's tail deformations, I was getting pretty bad deformations as the tail dragged and followed the arcs in those areas. Later on, I decided to start using a screen marker to draw on my screen on top of my frames and it finally started to come together. I think I went through 20 or so versions and revisions after receiving feedback from my classmates and mentor before I had something I was "kinda" happy with. YAY! :)

Monday, September 10, 2012
Class 1 / Week 6: Overlapping Action
Week 6 was another fun yet challenging assignment! We were introduced to another principle of animation: Overlapping Action. This principle is the essential ingredient for making your animation feel "organic"by breaking up the movement so not everything happens at the same time.
For this week's assignment we had to create an animation of a pendulum with it's root or main body moving from side to side or in a "Figure 8" motion and animate the overlapping action and successive breaking of joints on the pendulum.
Here are some of the terms that go hand in hand when creating Overlapping Action :
Overlap: Not all parts of the body start their movements at the same time. Each part of the body is affected by the part that is directly above them in a hierarchy. Example: shoulder, upper arm, lower, arm, wrist and fingers. Not everything happens at the same time, once sections of the body leads as the others follow and so on. This is also called: Successive Breaking of Joints
Follow Through: generated by external forces such as weight, wind, gravity etc. For example tails, ears, hair and cloth. This can be animated once the main animation is done.
Drag: Also called as the Wave Principle. As the base or the main body moves the rest of the pieces will follow with a certain amount of drag until it catches up with the movement. The amount of drag depends on the speed and weight of the object in movement.
Lead and Follow: One object leads as the others parts are pulled behind.
*It is important to understand that all of this principles work closely together as a family and one cannot happen without the other.
My friend Lucas from Class 1 wrote a great post on his blog with lots of detailed information and illustrations on Overlapping Action. Make sure to check it out!
Here are my planning sketches and final animations after revisions.
Cheers! :)


Subscribe to:
Posts (Atom)